
Implementing the decorator pattern using System. Reflection.DispatchProxy

If you are new to the decorator pattern, let me start with a short explanation:

Decorator is a structural design pattern that lets you attach new behaviors to objects by placing these objects inside special wrapper objects that contain the behaviors.

A common use case for decorators is to implement Aspect Oriented Programming(AOP) which allows you to implement cross-cutting concerns like logging, caching, …

There are multiple ways to implement this pattern, you can manually implement it, use your DI container, use a source generator to write the boilerplate code or use a dynamic proxy that wraps call to the original class.

It’s this last approach I want to focus on in this blog post. You could use the great  Castle.DynamicProxy library but for simpler use cases, there is a built-in alternative through the System.Reflection.DispatchProxy class.

Let’s have a look at a small code example on how to use this class.

First we need to create a Decorator class that implements DispatchProxy:

Remark: Be aware that we cannot use constructor injection to inject parameters(like the logger in the example above).

We could now use the DispatchProxy.Create() method but I typically create a static method that allows me to wrap an existing class instance

Let's create an interface, corresponding class and apply the decorator:

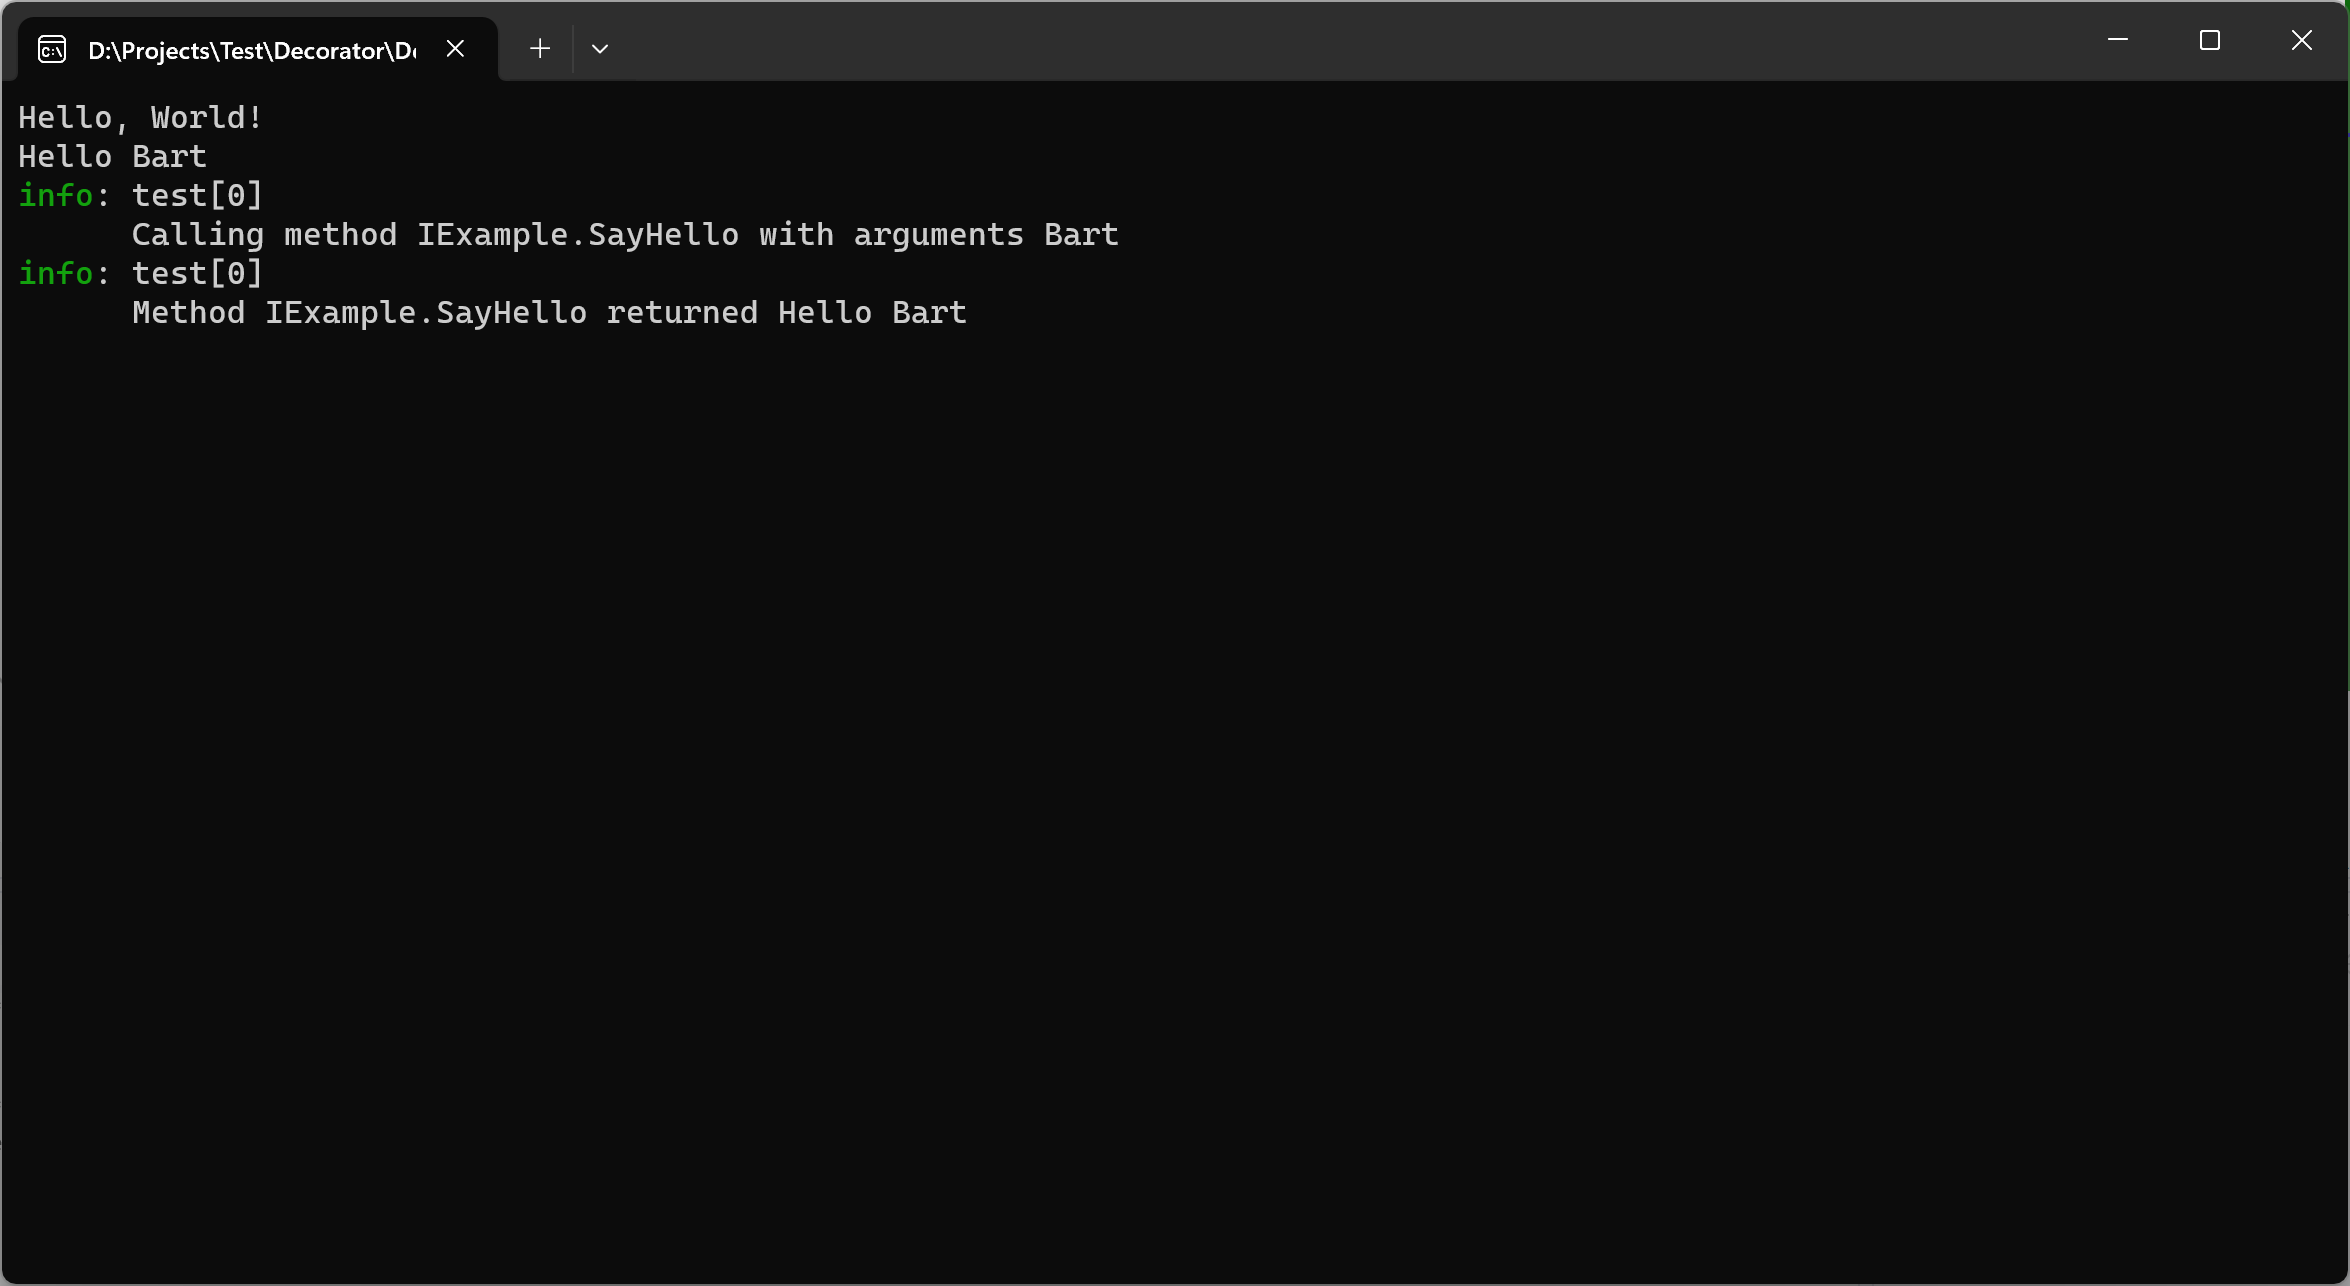
If we now run this code, the result looks like this:


Sweet!

There are some pros and cons when using this approach:

  • Pros
    • Works with .NET Standard 1.3+ (so it works with both .NET Framework 4.6+ and .NET Core/.NET 5).
    • No 3th party libraries needed.
    • Proxies by wrapping the target object, so a proxy can be created around an already existing object.
  • Cons
    • Proxies interfaces, not classes, so proxied types must implement an interface and access to any members not in the interface (like fields) is complicated.
    • Uses reflection, so not usable with AOT.
    • No support for async methods/functions.

More information

DispatchProxy Class (System.Reflection) | Microsoft Learn

Popular posts from this blog

Kubernetes–Limit your environmental impact

Reducing the carbon footprint and CO2 emission of our (cloud) workloads, is a responsibility of all of us. If you are running a Kubernetes cluster, have a look at Kube-Green . kube-green is a simple Kubernetes operator that automatically shuts down (some of) your pods when you don't need them. A single pod produces about 11 Kg CO2eq per year( here the calculation). Reason enough to give it a try! Installing kube-green in your cluster The easiest way to install the operator in your cluster is through kubectl. We first need to install a cert-manager: kubectl apply -f https://github.com/cert-manager/cert-manager/releases/download/v1.14.5/cert-manager.yaml Remark: Wait a minute before you continue as it can take some time before the cert-manager is up & running inside your cluster. Now we can install the kube-green operator: kubectl apply -f https://github.com/kube-green/kube-green/releases/latest/download/kube-green.yaml Now in the namespace where we want t...

Azure DevOps/ GitHub emoji

I’m really bad at remembering emoji’s. So here is cheat sheet with all emoji’s that can be used in tools that support the github emoji markdown markup: All credits go to rcaviers who created this list.

.NET 9 - Goodbye sln!

Although the csproj file evolved and simplified a lot over time, the Visual Studio solution file (.sln) remained an ugly file format full of magic GUIDs. With the latest .NET 9 SDK(9.0.200), we finally got an alternative; a new XML-based solution file(.slnx) got introduced in preview. So say goodbye to this ugly sln file: And meet his better looking slnx brother instead: To use this feature we first have to enable it: Go to Tools -> Options -> Environment -> Preview Features Check the checkbox next to Use Solution File Persistence Model Now we can migrate an existing sln file to slnx using the following command: dotnet sln migrate AICalculator.sln .slnx file D:\Projects\Test\AICalculator\AICalculator.slnx generated. Or create a new Visual Studio solution using the slnx format: dotnet new sln --format slnx The template "Solution File" was created successfully. The new format is not yet recognized by VSCode but it does work in Jetbr...
OSZAR »